
To submit URLs in bulk to the Google Indexing API using Python, you must:
-
- Create a Google Cloud project and enable the Indexing API.
- Create a service account and download the JSON key.
- Grant the service account owner access in Google Search Console.
- Install required Python libraries.
- Run a Python script to submit URLs in bulk.
This method is intended for time-sensitive or frequently updated content. It does not guarantee indexing, but it can accelerate crawling compared to sitemap-based discovery. It works similarly to “Request Indexing” in Search Console, with support for bulk submissions.
This guide is a non-programmer’s guide designed for SEOs, publishers, and non-developers who want a practical way to notify Google when pages are added or updated at scale. It walks through how to use the Google Indexing API with Python to submit URLs in bulk, helping address common issues where pages are crawlable but slow to be discovered or indexed.
Rather than relying solely on sitemaps, this approach can prompt faster crawling, making it particularly useful for time-sensitive or frequently updated content. The guide follows a clear, step-by-step format with screenshots, allowing you to set up the Indexing API and run a Python script to submit multiple URLs in one go without requiring advanced programming knowledge.
Quick Navigation
Step-by-Step Guide to Using Google Indexing API through Python
🚀 Skip the Setup: Use the Web-Based Bulk Indexer
If setting up Python, managing libraries, and handling JSON keys feels too technical, I have built a web-based version of this tool. It allows you to perform the same bulk indexing tasks directly in your browser without any coding.
Why use the Web Tool?
- No Installation: No need for Python, Pip, or terminal commands.
- Simpler Auth: Just “Sign in with Google” and select your verified site.
- Visual Interface: Paste your URLs and watch the real-time submission log.
- No JSON Keys: Uses secure OAuth login instead of service account files.
Prerequisites & Setup
Before submitting URLs via the Google Indexing API, you must configure access in Google Cloud and Google Search Console and install Python on your system.
Step 1: Install Python
What this step does: Installs Python on your system so you can run the Google Indexing API script from the command line.
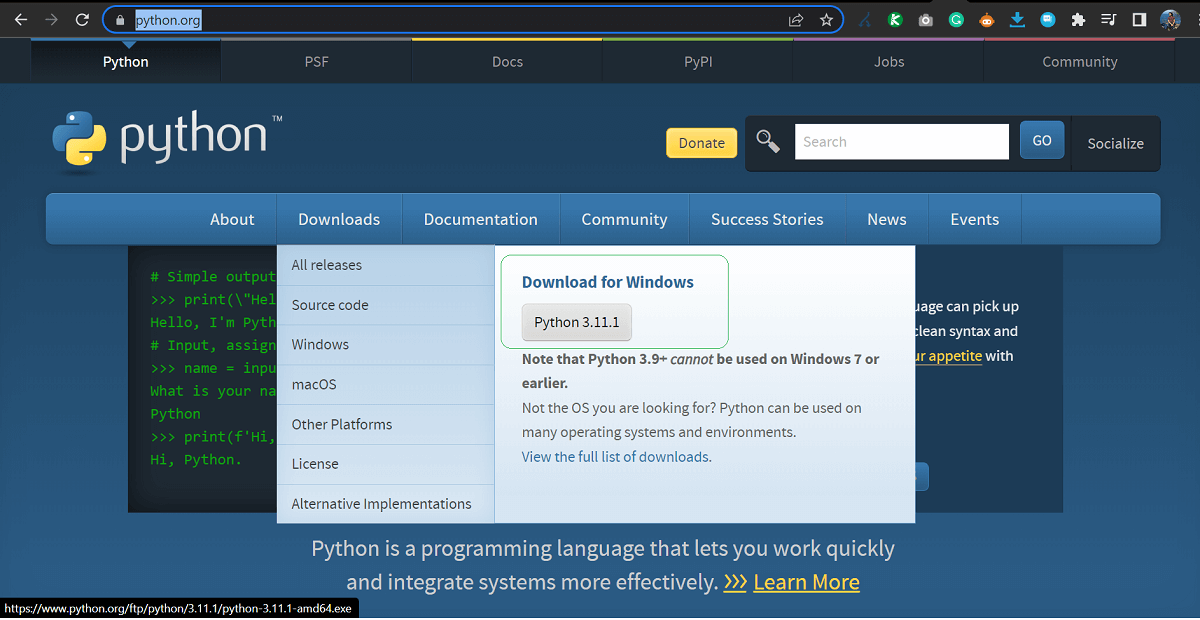
Head to https://www.python.org/ to download and install the latest Python version to run the indexing script. For this guide, I will be installing the Windows version since I use a PC. But the process is similar for Mac. After the executable is downloaded, follow the self-explanatory instructions to complete the installation.
Step 2: Setting up the Indexing API key in your Google Cloud Platform
What this step does: Creates a Google Cloud project, service account, and API credentials that allow your Python script to securely authenticate with the Google Indexing API.
Head to Google Cloud Platform. Google Indexing API is free. So do not worry about adding a billing account if you are just using the Indexing API.
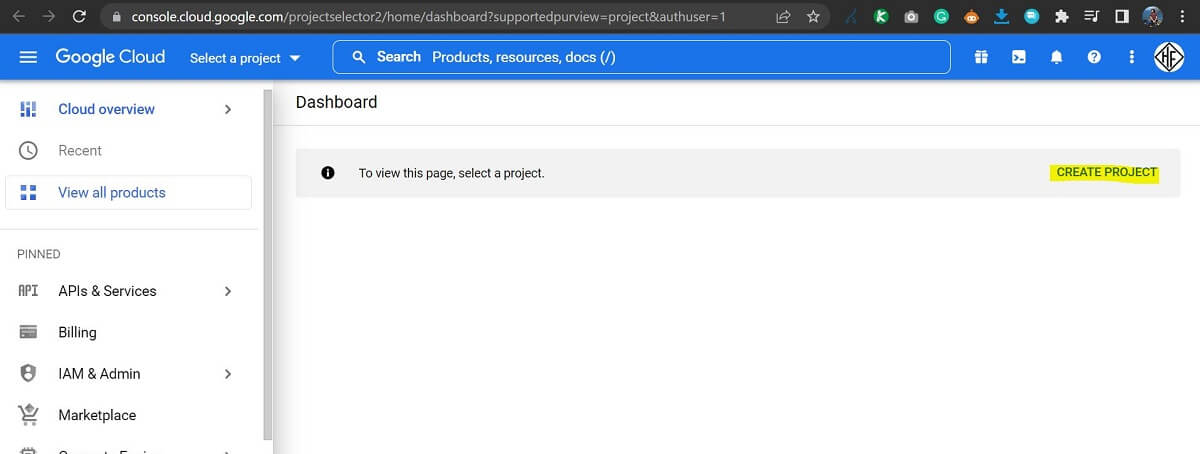
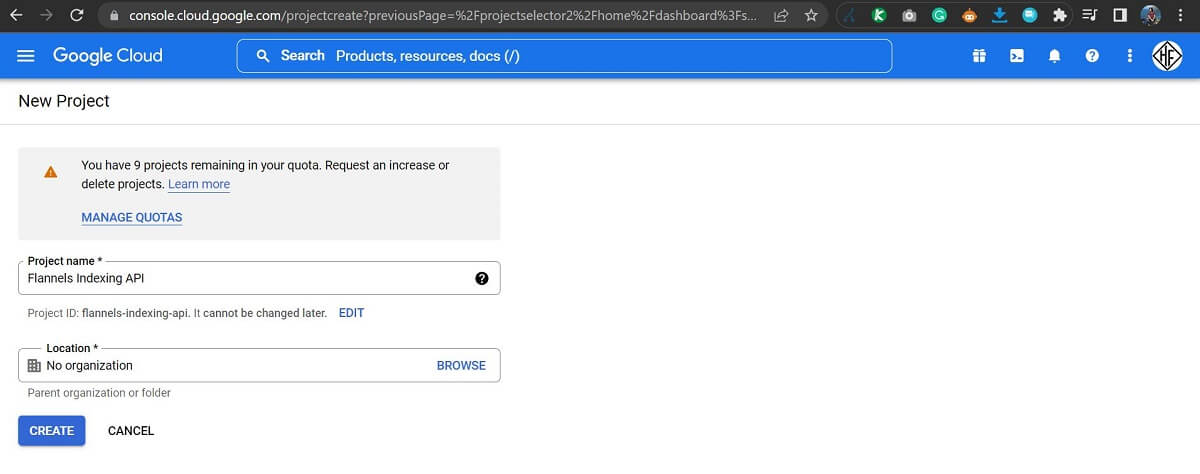
- Create a New Project – Click on the project dropdown in the top navigation bar and select “New Project”. Give it a name that is relevant and easy to remember. Since I am going to be using this for sorting indexing issues for Flannels, I’ll name the project ‘Flannels Indexing API’. Click on the Create Button.
- Head to the Newly Created Project (Flannels Indexing API project). After the new project is created, keep it as the selected project as shown in the screenshot below and follow the next steps.

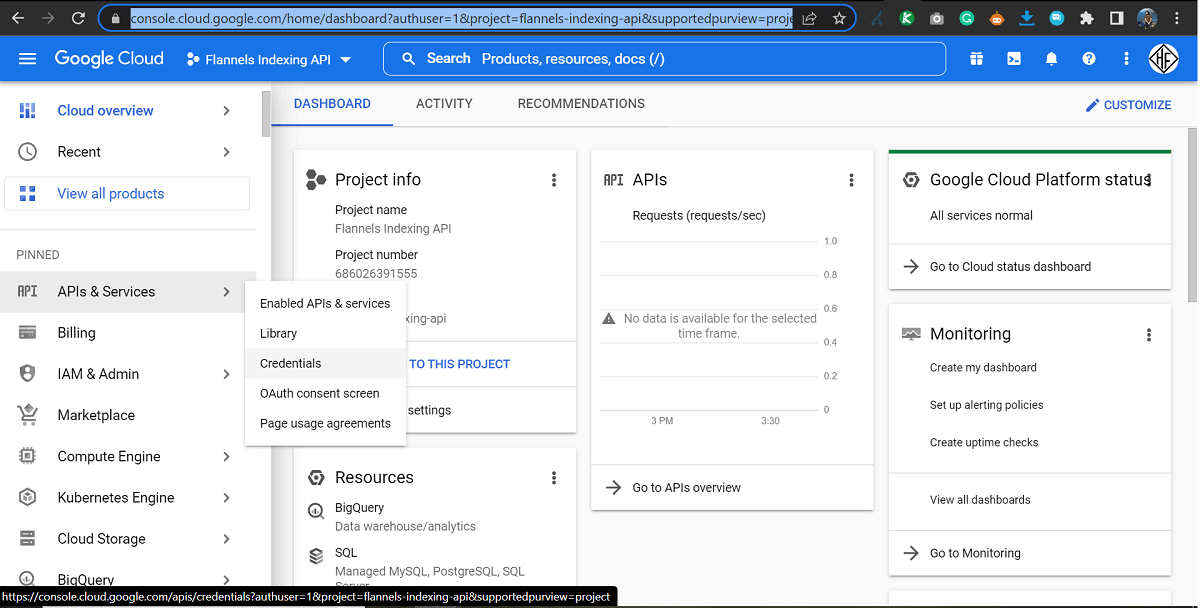
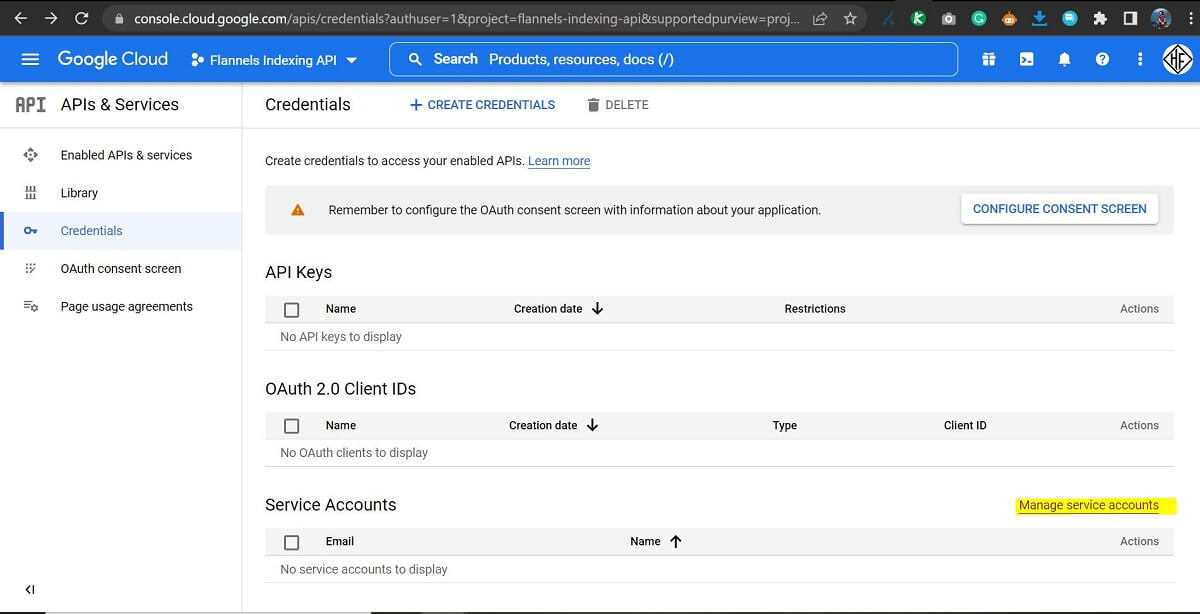
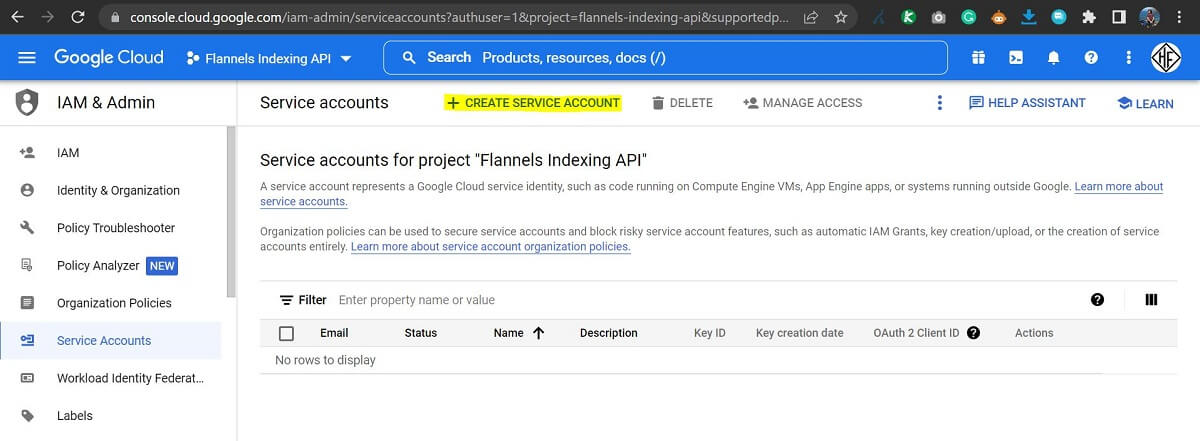
- Set up APIs & Services Credentials. For this, you need to set up the API credentials by visiting the Credentials link under the APIs & Services menu using the left sidebar. Once you are on the Credentials window, click on ‘Manage Service Accounts’ and create a new Service Account (“IAM & Admin” > “Service Accounts”).
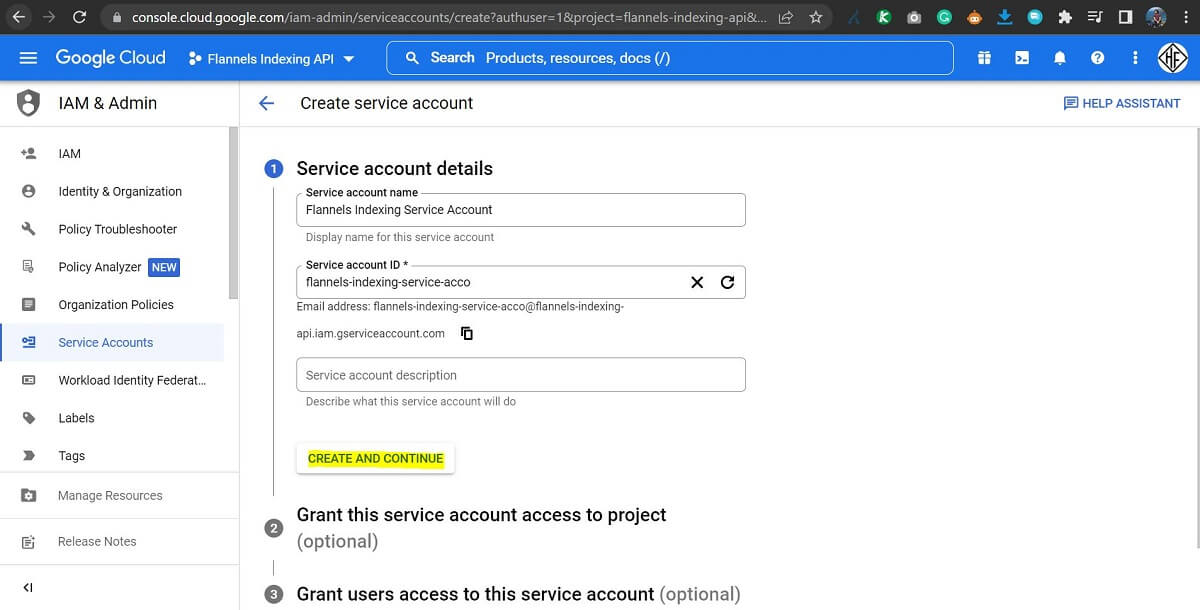
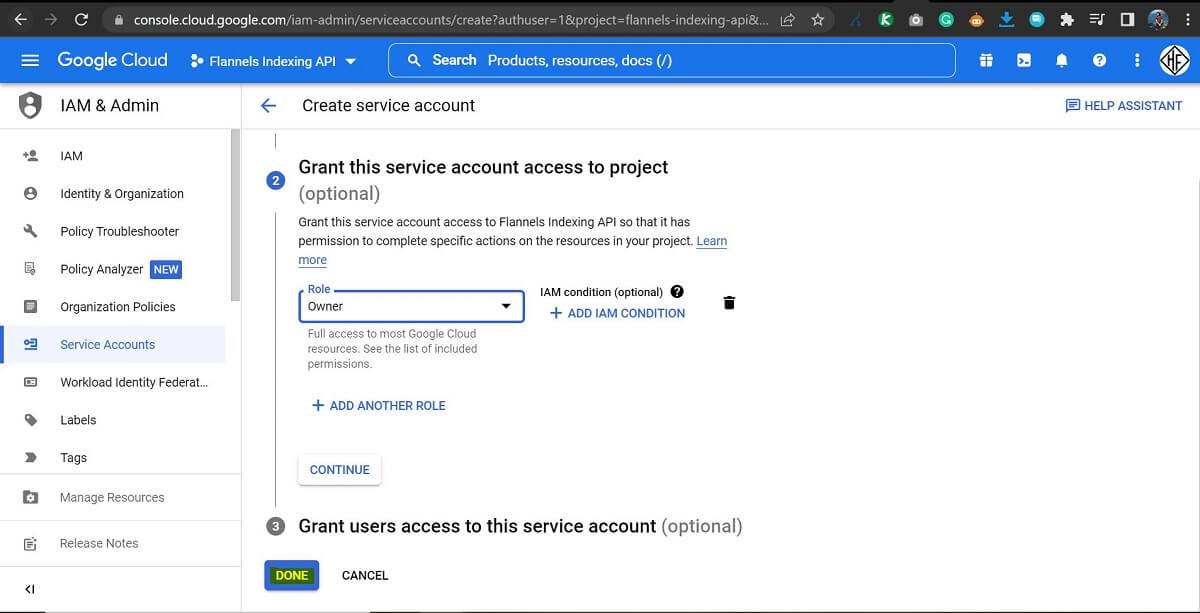
- Create a Service Account. On the Create Service Account screen, you can follow the steps shown on the screen to set up your new service account. Please name the account with a memorable name that is relatable to your project. I am just going by the name ‘Flannels Indexing Service Account’ since this project is meant for Flannels. Once you add the name and click on Create and continue, you will need to select a role to grant your service account access to the project. Please select the ‘Owner’ role and click the Done button to finish setting up the service account.
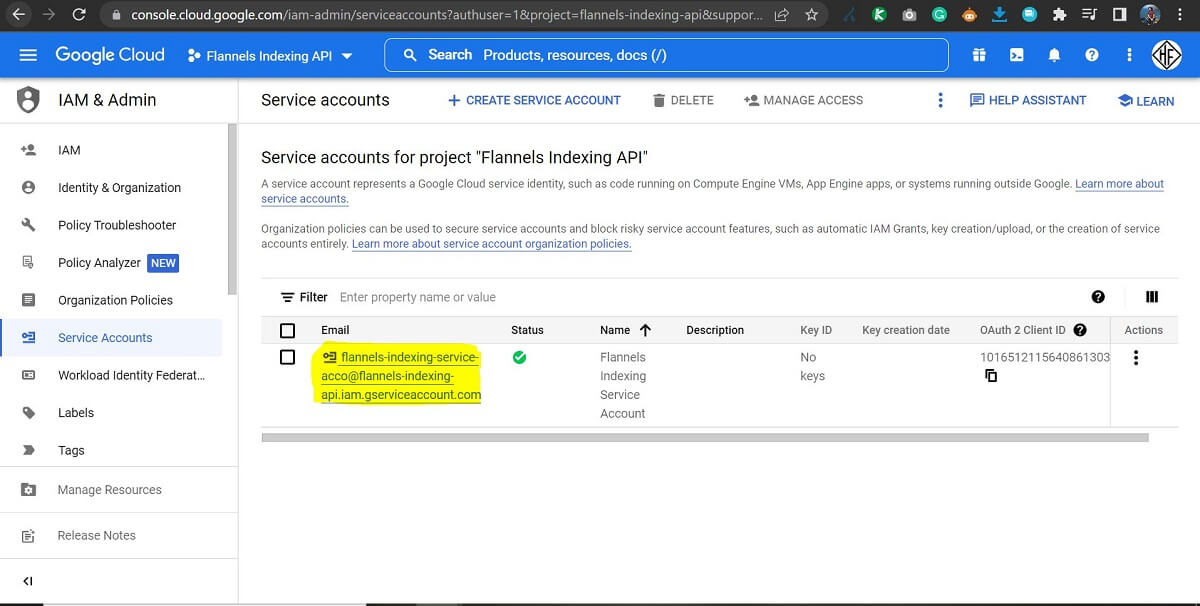
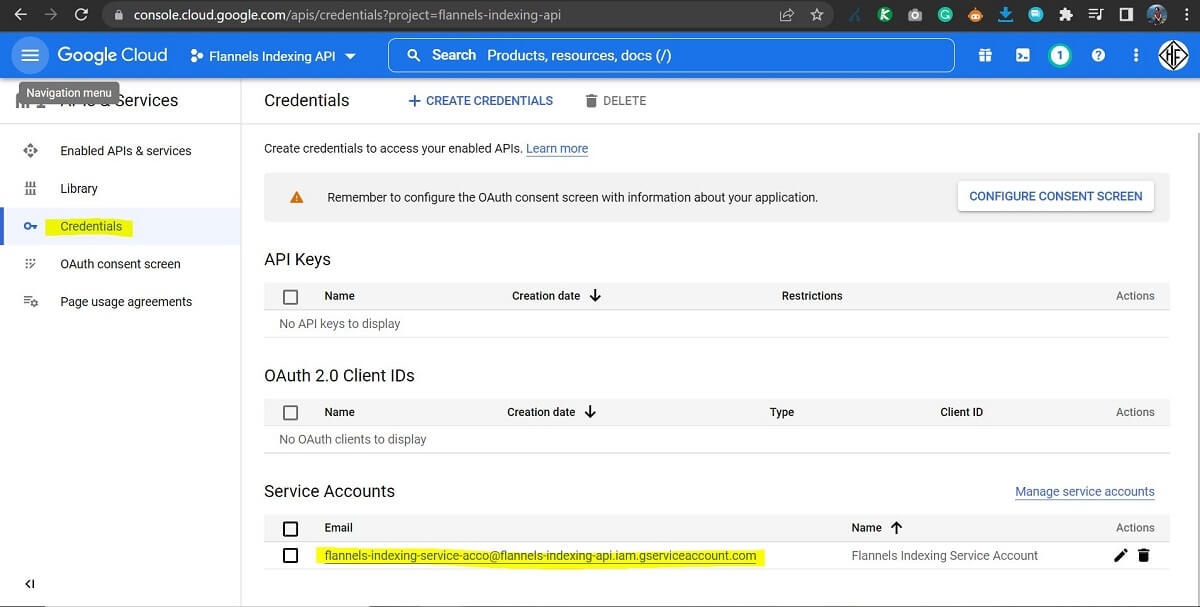
- Once you are done with the above step, you will be taken to the ‘Service accounts for the project screen, as shown in the screenshot below. You will notice an email address (gservicesaccount.com email address) associated with your project and service account. Make a note of this email address, as you will be using this email address in Step 3 of this guide. So, my advice is to save the email ID in a local notepad file.
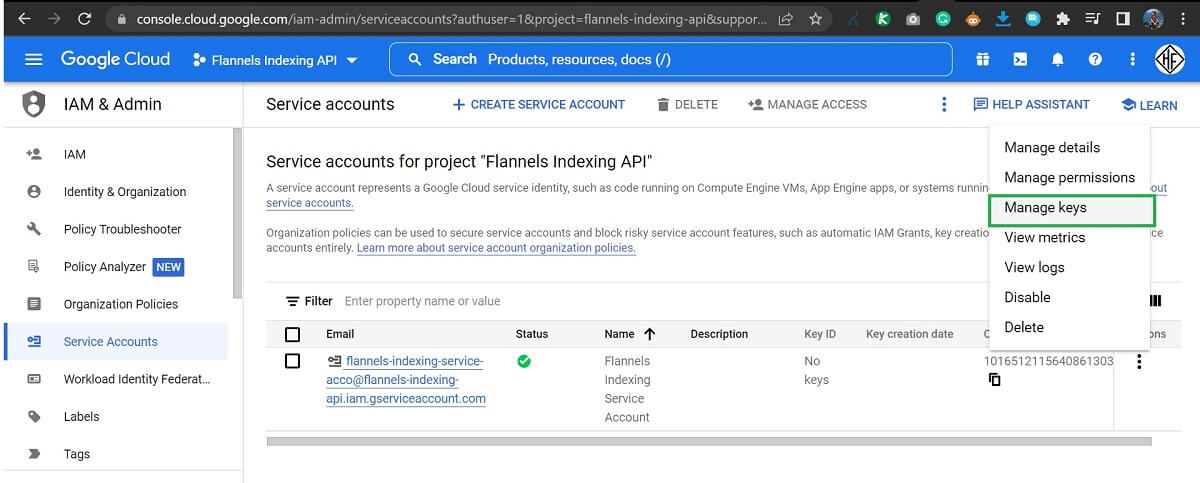
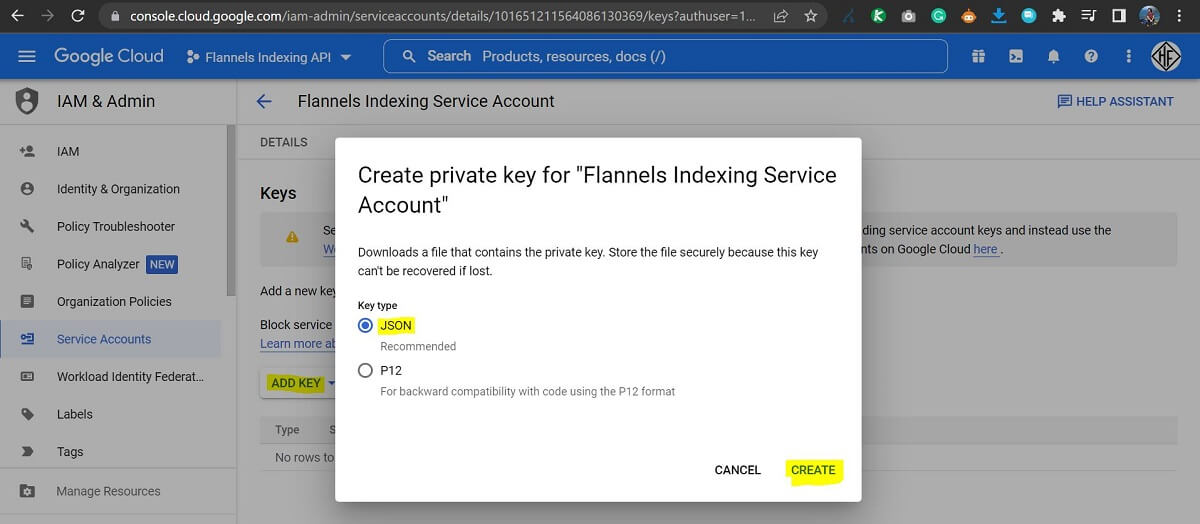
- Create a Key for your Service Account. Click on the three dots under the actions column and select the ‘manage keys’ option. You will be taken to the ‘Keys’ screen, where you can add a key by clicking on the ‘Add Key’ button. Keep the JSON option selected and click on the ‘Create’ button. A small JSON file will be downloaded. This is an authentication file which will verify your API access. A window displaying ‘Private key saved to your computer’ will appear, which can be safely closed.
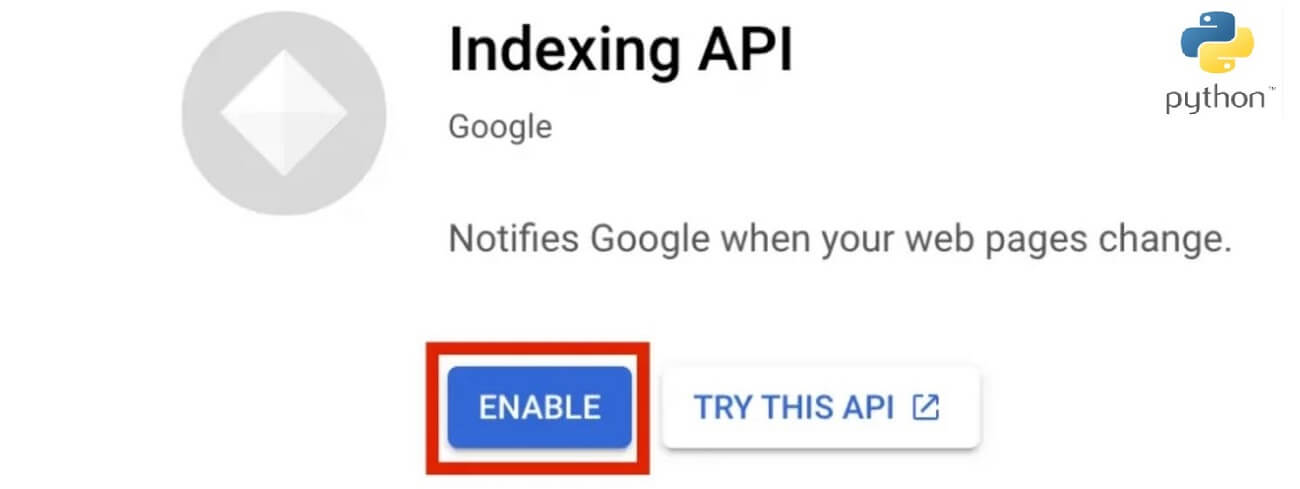
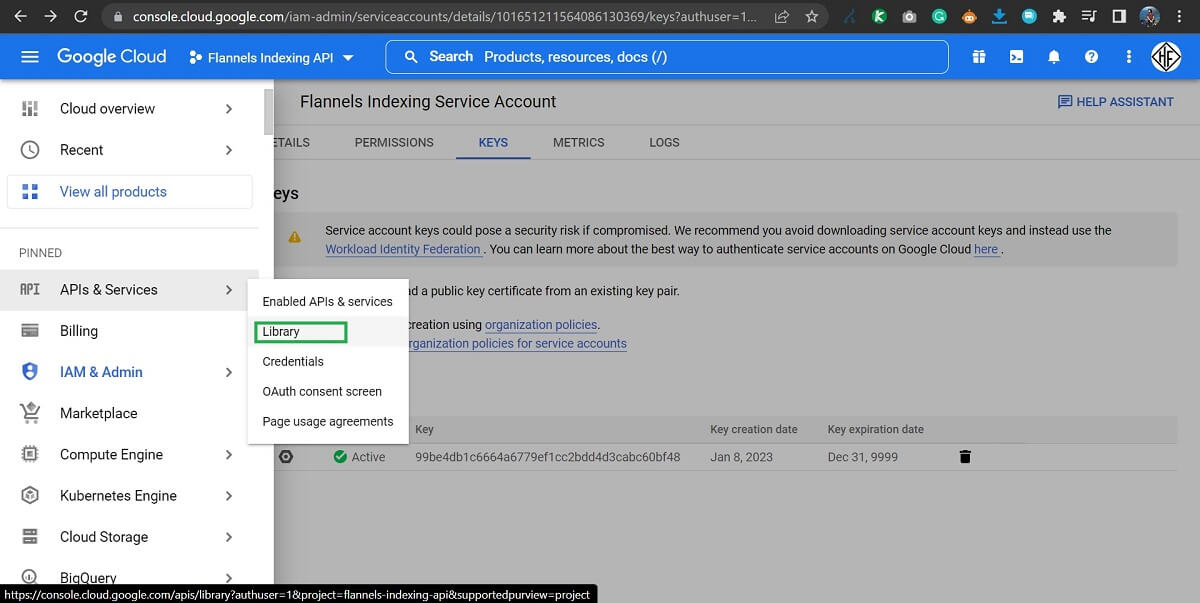
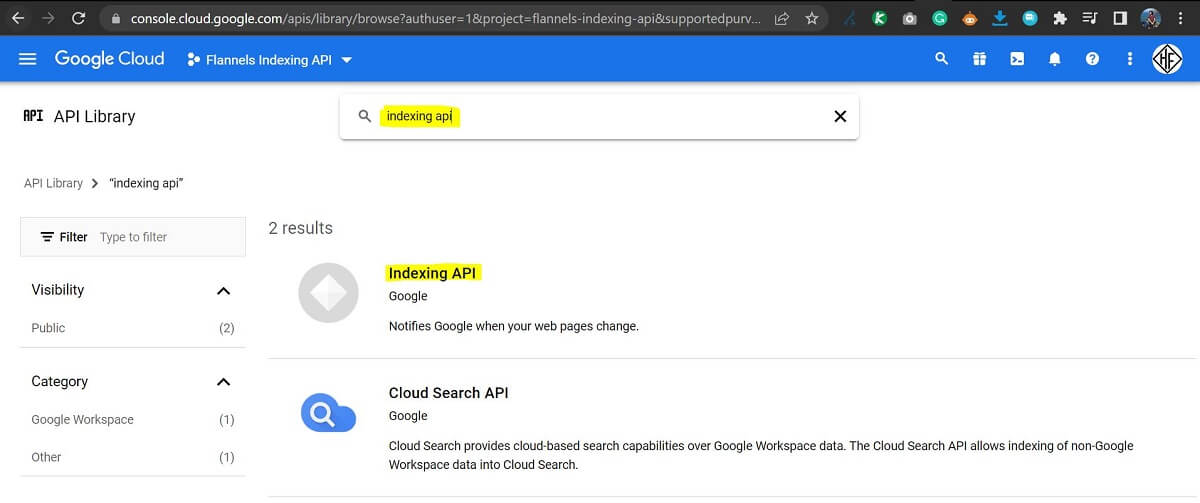
- Enable the Indexing API. The next step is to enable the Indexing API. To do this, click on the ‘Library’ link under the API & Services menu section. Search for ‘indexing API’ and select the first Indexing API option from the two options shown. Click the ‘enable’ button on the next screen to activate the API for your project.
This completes all the steps of ‘Setting up the Indexing API key in your Google Developer Console’.
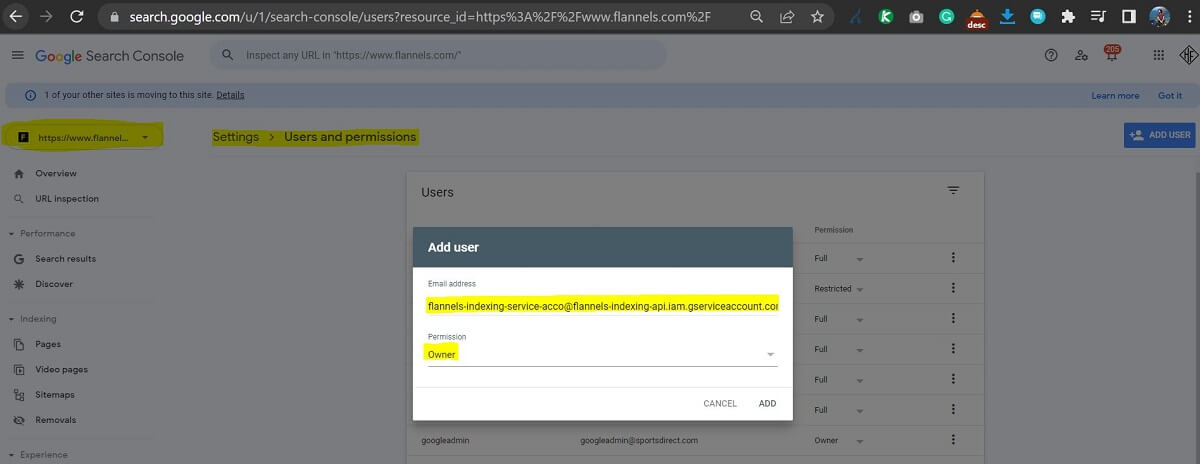
Step 3: Grant Owner Access to GServicesAccount Email in your Google Developer Console
What this step does: Grants your service account permission to submit indexing requests for a verified website in Google Search Console.
The script will only work for websites where you have verified ownership in Google Search Console. This verification is crucial as it ensures only authorised owners can submit indexing requests for a domain.
In this step, you will grant owner-level access to the gservicesaccount.com email address that was created in the previous step. If you did not save the email address in the previous step, you can view the email address by selecting the Credentials link on the left sidebar. Once you have copied the email address, visit your Google Search Console account and select the website property you want to use the indexing API for. I have used it for Flannels as shown in the screenshot. You will need to be an owner of the property yourself to grant new ownership access to the gserviceaccount.com email.
Step 4: Final Step – Running the Python Script
What this step does: Uses a Python script to submit a bulk list of URLs to Google’s Indexing API for faster crawling.
So far, in the previous steps, you completed the setup of the Indexing API key in your Google Developer Console, installed Python and granted owner access to the API key in your search console. Now we are in the final step, where we will use the Google indexing API with a Python script.
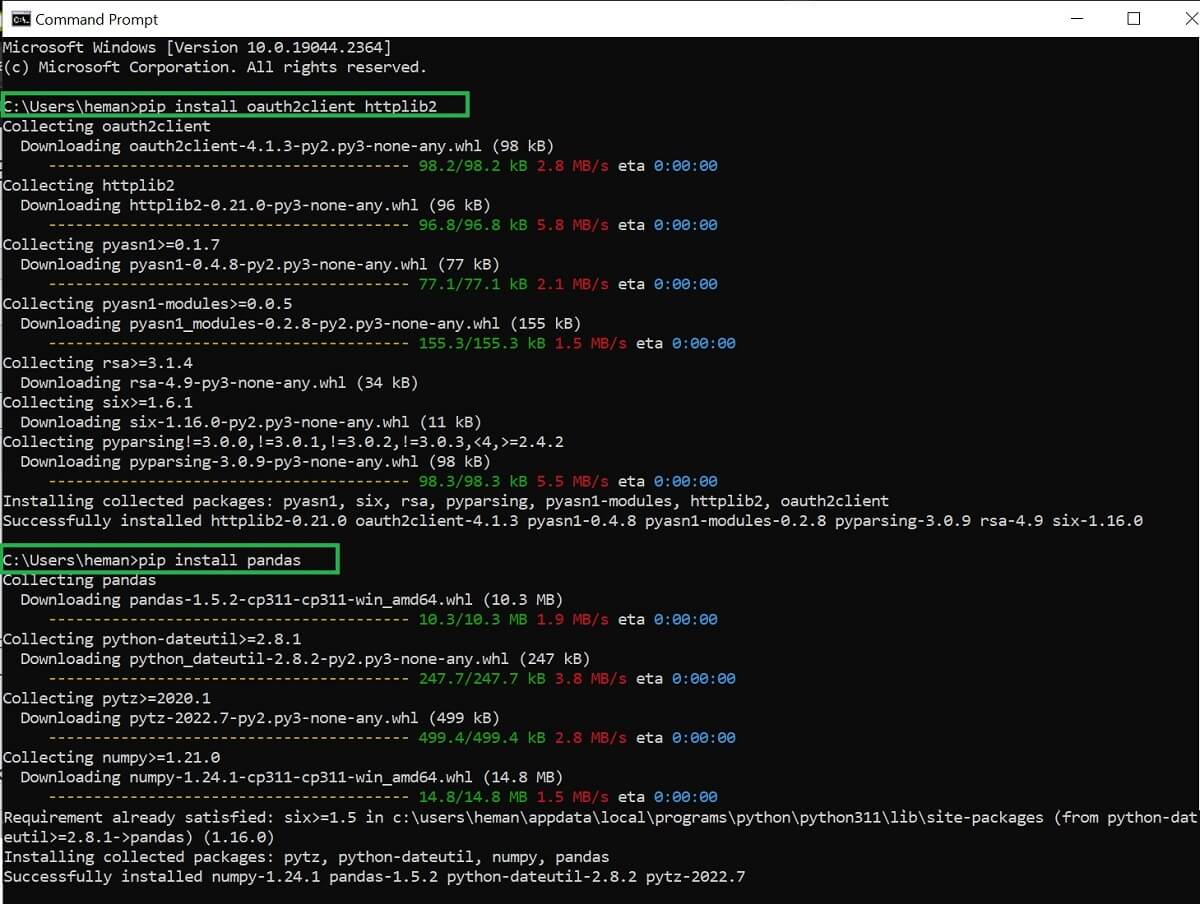
- Install Required Libraries. Go to your Windows command prompt (search for CMD if you are using Windows or terminal if you are using a MAC). We will need to install some libraries before being able to use the indexing API. Run the following two commands on your command prompt. The httplib2 and the pandas libraries will download and install on your system.
For Windows Users
Command: pip install google-auth requests pandas openpyxl
For Mac Users
Command: pip3 install google-auth requests pandas openpyxl
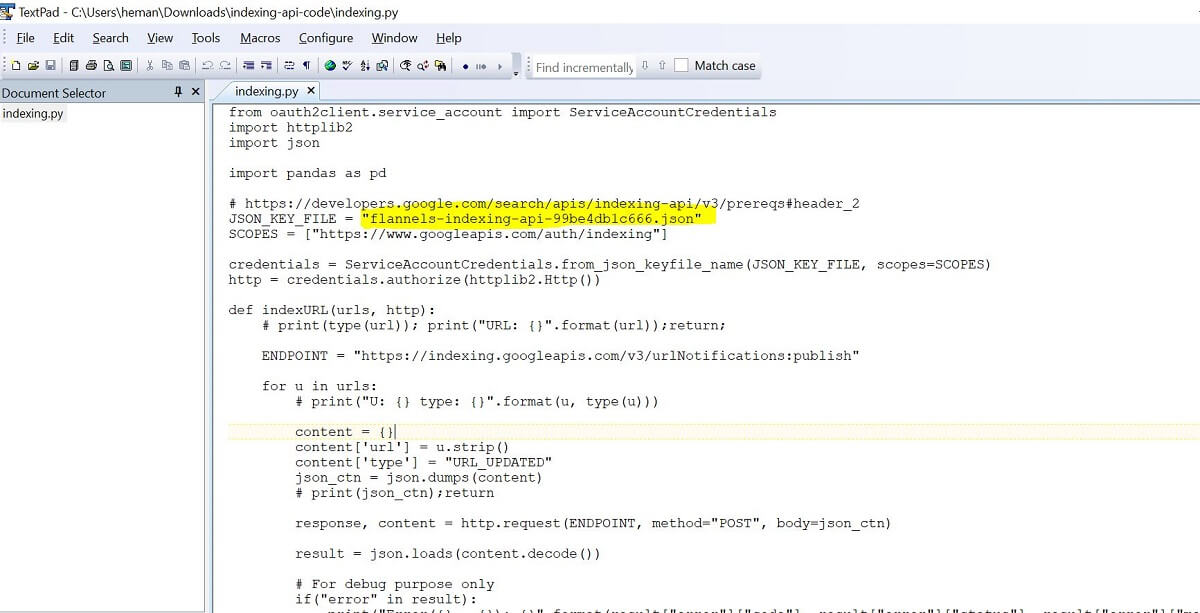
- Create a folder to include 3 files – Python Script, urls.xlsx and the JSON file that was previously downloaded. The JSON file that was downloaded in Step 2 will need to be moved into this folder. Download the urls.xlsx, which will contain the list of URLs you want to submit to Google, and the indexing.py Python code using this link and move them all to one folder, like the screenshot below.
- Update the Python Code and the .xlsx File. The only change you need is to make a small change in line 8 of the indexing.py Python code. Change the name of the JSON file on this line
SERVICE_ACCOUNT_FILE = "YOUR_JSON_FILE.json"to the name of your JSON file. You can edit the file using software like Textpad or Notepad++. You can use Brackets on Mac. Next, you will need to add the URLs in column A of the urls.xlsx file. Do not remove the first row containing URL and Date values. You can add a maximum of 1000 URLs at a time.

- Execute the Script. Open the command prompt (on your PC) or terminal (if using a Mac) and navigate to the folder containing the 3 files. You can use the change directory CD command as shown in the screenshot below. Once you are in the right folder, you can execute the script using the command below.
For Windows Users
Command: python indexing.py
For Mac Users
Command: python3 indexing.py
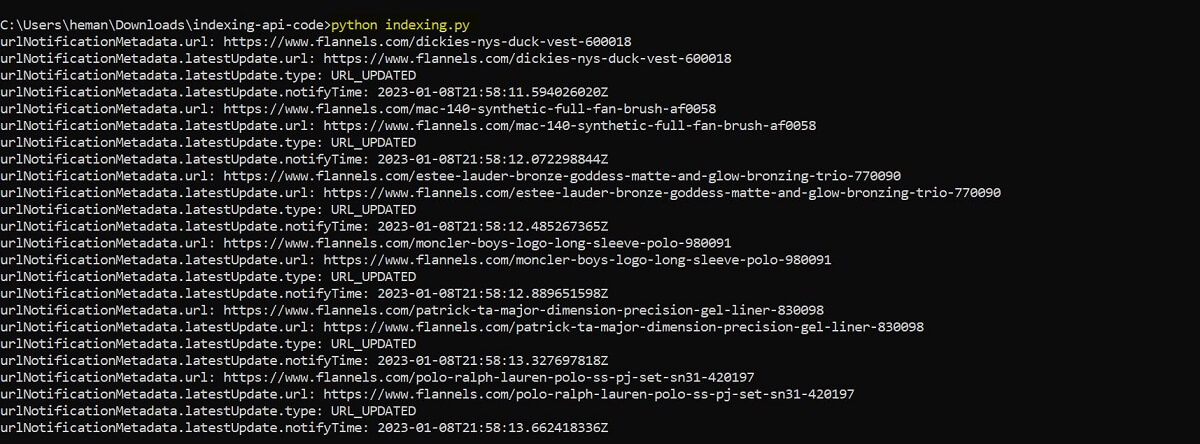
Once you enter the command and press the Enter button, you will see Google URL update notifications for all the URLs that were entered in your urls.xlsx one by one, along with timestamps.
This concludes the guide to Google Indexing API implementation through Python on the command line. Please note that this is not a guaranteed way of indexing your URLs. It is the same as fetching and submitting URLs on the search console. The only advantage of this method is that you can do this in bulk to save time.
Hello
Thanks for this detailed and easy to follow article.
However, I get a KeyError: ‘latestUpdate’
Is there a way around this?
thanks, Stuart
Just give me a couple of days. I’ll work on it this week.
I have updated the code.
I still got the latest update from the new key. Any way around it?
hi,
Thank you for sharing.
I tested your code and it doesn’t work anymore .
New code updated.
I have updated the code on 23rd February 2025. This is now working.
Thank you, I ran it successfully. Thank you istanbul/turkey
I ran the script and it worked, until about 200 URLs. I checked the google cloud console and it said I exceeded my quota at 202. Is there a way to get by this? I have a little over 16,000 URLs
You can only submit 200 URLs per day. That’s a restriction from Google.
Thanks, I got the code working correctly, great work!